

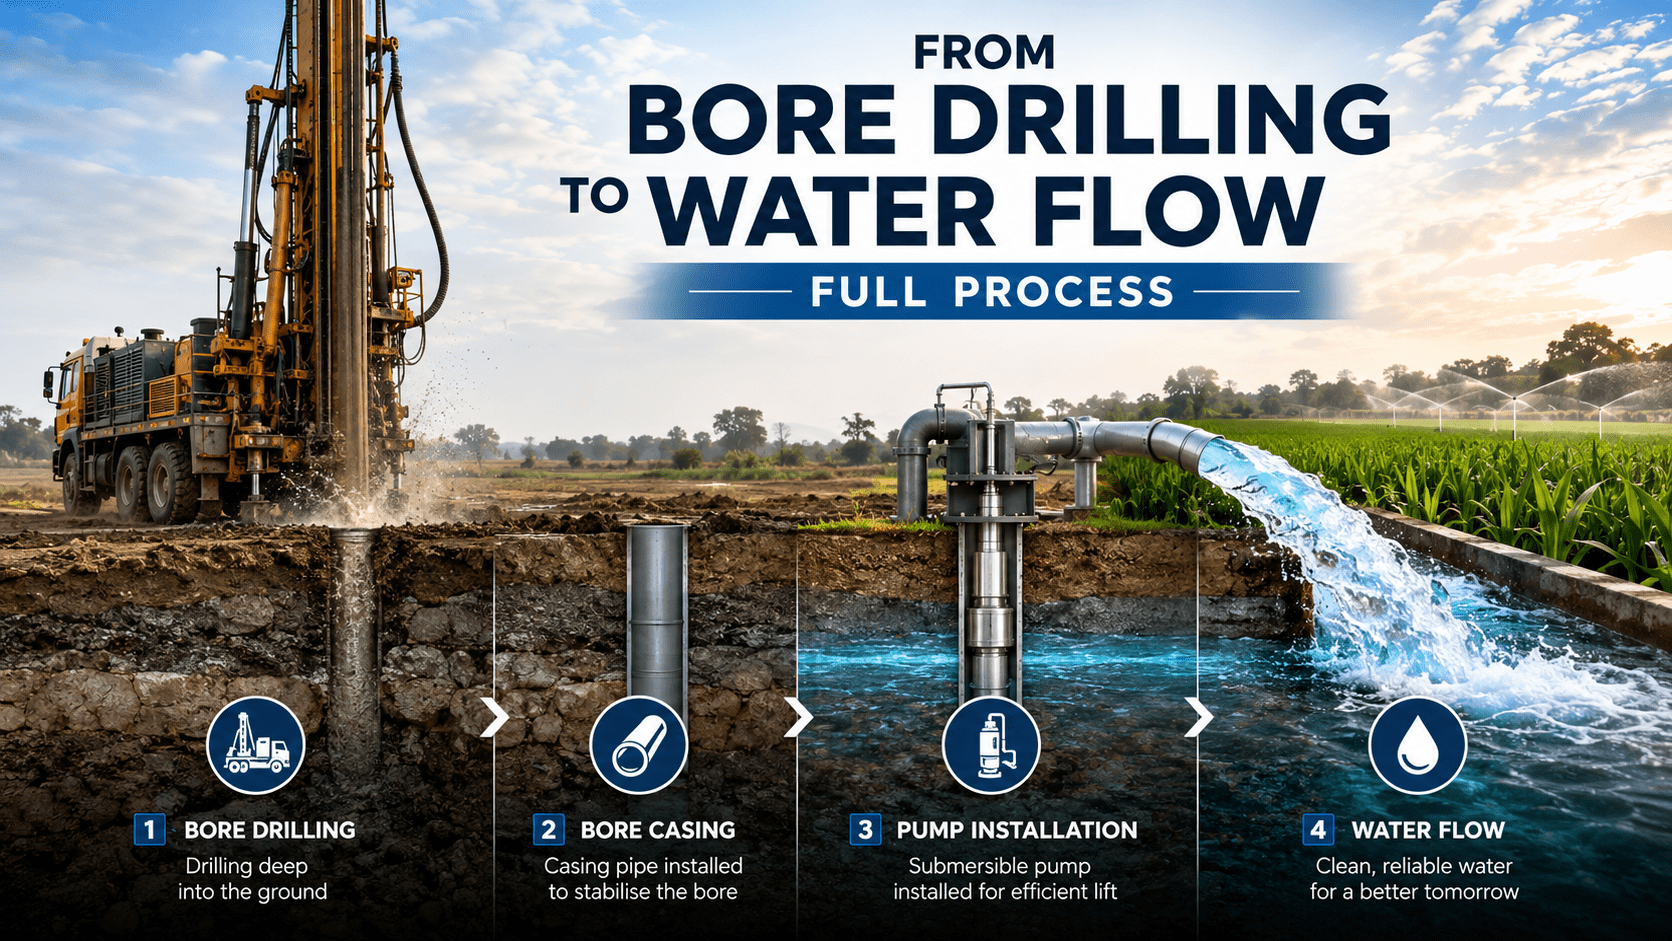
From Bore Drilling to Water Flow – Full Process

Complete Step-by-Step Guide for a Successful Water Bore
Water is one of the most valuable resources for agriculture, industry, homes, farmhouses, schools, factories, and commercial projects. But getting clean and reliable underground water is not as simple as just drilling a hole in the ground. A successful bore depends on proper planning, correct drilling method, quality casing, right pump selection, proper development, and final water flow testing.
Many bore failures happen because people focus only on “how many feet deep” the bore is. In reality, depth is only one part of the process. A bore can be deep and still give poor water if the location, diameter, casing, filter, pump, and development are not handled correctly.
This guide explains the complete journey from bore drilling to actual water flow in a simple, practical, and professional way.
Quick Overview: Full Bore Drilling Process
A complete bore drilling project usually includes:
- Site inspection and water investigation
- Selection of drilling point
- Choosing bore diameter and estimated depth
- Rig setup and drilling
- Geological formation checking
- Casing and screen installation
- Gravel/filter pack placement
- Bore washing and development
- Pump selection and installation
- Electrical or solar setup
- Pipeline connection
- Water flow testing
- Final handover and maintenance guidance
Eye-catching takeaway:
A bore is not successful when drilling is finished. A bore is successful when clean water flows consistently with the right pressure, right discharge, and minimum sand.
Step 1: Site Inspection and Water Investigation
Before drilling starts, the first step is to study the site. A professional team checks the land condition, nearby bore results, soil type, expected water depth, access for drilling machinery, and customer requirements.
For example, an agriculture bore may need high discharge for irrigation, while a farmhouse bore may need moderate but clean water. A factory may need continuous supply, and a school may need safe water for daily use.
Important points checked during inspection:
- Previous bore history in the area
- Water table depth
- Soil and rock condition
- Availability of space for drilling rig
- Distance from buildings, septic tanks, drains, and power lines
- Required water use: domestic, agriculture, industrial, or commercial
- Future pump and pipeline requirements
A good site survey reduces risk. It does not guarantee water 100%, but it helps choose the best possible drilling point.
Step 2: Choosing the Right Bore Location
The drilling point should be selected carefully. A poor location can increase drilling cost, reduce water discharge, or create maintenance problems later.
A good bore location should be:
- Easy for drilling rig access
- Away from contamination sources
- Suitable for pump installation
- Close enough to pipeline or storage tank
- Safe from heavy vehicle damage
- Practical for future maintenance
Avoid drilling too close to:
- Septic tanks
- Open drains
- Chemical storage areas
- Waste dumping points
- Weak building foundations
- Underground utilities
- High-voltage electric lines
Professional tip:
Always think about future service. A bore may need pump lifting, wire replacement, pipe change, or cleaning after years. If the bore is placed in a tight or blocked area, maintenance becomes expensive and difficult.
Step 3: Bore Design – Depth, Diameter, and Purpose
Before drilling starts, the bore design should be clear. The design depends on the purpose of water use and underground formation.
Main design decisions include:
- Total drilling depth
- Bore diameter
- Casing size
- Screen/slotted pipe length
- Pump size
- Expected discharge
- Delivery pipe size
- Power source: grid, diesel, or solar
For domestic use, a smaller bore and pump may be enough. For agriculture, the bore diameter and pump must support higher water flow. For industrial use, durability and continuous operation are very important.
A common mistake is installing a pump based only on horsepower. Pump selection should be based on:
- Bore depth
- Static water level
- Pumping water level
- Required discharge
- Delivery height
- Pipe distance
- Power availability
- Water quality and sand condition
Important:
A bigger pump does not create more underground water. The pump can only lift the water that the aquifer can supply.
Step 4: Drilling Rig Setup
Once the location and design are finalized, the drilling rig is moved to the site. The ground must be prepared so the rig stands stable and safe.
Rig setup includes:
- Positioning the drilling machine
- Leveling the rig
- Arranging drilling rods and tools
- Managing water supply for drilling
- Preparing mud pit or discharge area
- Checking safety around the site
- Keeping workers and visitors away from moving equipment
The drilling team must keep the bore straight as much as possible. A badly aligned bore can create problems during casing installation, pump lowering, and future maintenance.
Step 5: Drilling the Borehole
The drilling process starts by cutting through soil, sand, clay, gravel, or rock layers. The method depends on local geology and required depth.
Common drilling methods include:
- Mud rotary drilling: Useful in loose soil, clay, and sandy formations.
- Air drilling: Often used in hard rock formations.
- Percussion drilling: Used in certain tough formations.
- Reverse rotary drilling: Used for large-diameter, high-capacity wells.
During drilling, the team observes the material coming out of the bore. This helps identify underground layers.
The driller may find:
- Top soil
- Clay
- Fine sand
- Coarse sand
- Gravel
- Soft rock
- Hard rock
- Water-bearing formation
A drilling log should be maintained because it helps in deciding where to install screen/slotted casing.
Step 6: Identifying Water-Bearing Layers
Not every underground layer gives water. Some layers only hold clay or dry soil. The main target is the water-bearing formation, also called the aquifer.
Good water-bearing layers may include:
- Coarse sand
- Gravel
- Fractured rock
- Mixed sand and gravel
- Porous formations
Poor layers may include:
- Thick clay
- Very fine sand
- Hard dry rock
- Contaminated shallow layers
The drilling team should carefully observe:
- At what depth water appears
- How much water is expected
- Whether the formation is sandy
- Whether the water has smell, color, or salinity
- Whether the bore needs more depth
Eye-catching point:
The best bore is not always the deepest bore. The best bore is the one that reaches the right water-bearing layer and is completed properly.
Step 7: Casing Installation
Casing is one of the most important parts of a bore. It is the pipe structure installed inside the borehole to protect it from collapse and contamination.
Casing helps to:
- Keep the bore open
- Prevent soil from falling inside
- Protect the pump
- Reduce contamination risk
- Support water entry through screened sections
Common casing materials include:
- PVC casing
- UPVC casing
- Steel casing
- Stainless steel casing for special applications
For most domestic and agriculture bores, quality PVC or UPVC casing is commonly used. For deeper or heavyasing Installation
Casing is one of the most important parts of a bore. It is the pipe structure installed inside the borehole to protect it from collapse and contamination.
Casing helps to:
- Keep the bore open
- Prevent soil from falling inside
- Protect the pump
- Reduce contamination risk
- Support water entry through screened sections
Common casing materials include:
- PVC casing
- UPVC casing
- Steel casing
- Stainless steel casing for special applications
For most domestic and agriculture-duty industrial bores, steel or stronger casing may be required depending on formation and pressure.
Poor casing can cause serious problems:
- Bore collapse
- Sand entry
- Pump jamming
- Dirty water
- Reduced bore life
- Expensive repair
Step 8: Screen or Slotted Pipe Installation
Screen or slotted casing is installed where water needs to enter the bore. It allows groundwater to enter while blocking larger particles.
The screen section must be placed at the correct water-bearing formation. If screen placement is wrong, the bore may give less water or more sand.
Screen selection depends on:
- Aquifer material
- Sand size
- Required water flow
- Bore diameter
- Pump capacity
A good screen improves:
- Water entry
- Flow stability
- Pump protection
- Bore life
- Sand control
A bad screen design can create:
- Excessive sand
- Low discharge
- Blockage
- Pump wear
- Frequent maintenance
Step 9: Gravel Pack / Filter Pack
After casing and screen are installed, gravel or filter material is placed around the screen area between the borehole wall and casing. This is called gravel packing or filter packing.
The filter pack works like a protective layer. It helps water enter smoothly while reducing fine sand movement.
Benefits of proper gravel pack:
- Reduces sand pumping
- Supports borehole wall
- Improves water flow
- Protects pump parts
- Increases bore life
The size of gravel should match the formation. If gravel is too large, fine sand may enter. If it is too small, water flow may reduce.
Professional tip:
Filter pack is not just “filling stones.” It must be clean, properly sized, and placed carefully.
Step 10: Bore Sealing and Protection
A bore should be sealed properly near the top to prevent dirty surface water from entering. Surface contamination can come from rainwater, drains, animals, chemicals, or wastewater.
Good bore protection includes:
- Proper top sealing
- Concrete platform if required
- Bore cap
- Safe electrical connection
- Protection from vehicles
- Proper drainage around borehead
This step is very important for drinking water, schools, homes, farmhouses, and food-related industries.
Step 11: Bore Washing and Development
After drilling and casing, the bore is not ready immediately. It must be cleaned and developed.
During drilling, mud, clay, fine sand, and loose particles may block the water-bearing formation. Bore development removes these particles and opens the flow path.
Common bore development methods include:
- Air flushing
- Surging
- Over-pumping
- Backwashing
- Cleaning with compressor
- Repeated pumping until water clears
The purpose of bore development is to:
- Remove drilling mud
- Remove fine sand
- Improve water flow
- Stabilize the aquifer around screen
- Reduce turbidity
- Protect pump from early damage
This is one of the most ignored steps. Many people install the pump too quickly after drilling. As a result, the pump starts lifting sand, gets damaged, or loses performance.
Eye-catching warning:
Skipping bore development is like buying a new engine and running it without cleaning the fuel line.
Step 12: Water Level Checking
Before pump selection, water levels should be checked.
Important water levels include:
- Static water level: Water level when the bore is not pumping.
- Pumping water level: Water level while the pump is running.
- Drawdown: Difference between static and pumping water level.
- Recovery level: How fast water returns after pumping stops.
These readings help in selecting the correct pump depth, horsepower, impeller stages, and delivery system.
If water level drops too much during pumping, the bore may not support a high-capacity pump. In that case, a smaller pump or controlled pumping system may be better.
Step 13: Pump Selection
Pump selection is where many projects go wrong. People often say, “Install 5HP” or “Install 10HP” without proper calculation. But horsepower alone does not decide performance.
A correct pump should match:
- Bore depth
- Water level
- Required discharge
- Delivery height
- Pipe length
- Friction losses
- Power supply
- Solar system capacity if using solar
- Water quality
- Bore yield
Common pump types include:
- Submersible pump
- Turbine pump
- Solar submersible pump
- AC pump
- DC pump
- Surface pump for shallow water
For deep bores, submersible pumps are commonly used. For agriculture and high-flow applications, pump sizing must be done carefully to avoid underperformance or overload.
Step 14: Pump Installation
Once the pump is selected, it is lowered into the bore with delivery pipe, cable, safety rope, and control system.
Pump installation includes:
- Checking pump and motor
- Connecting delivery pipe
- Attaching power cable properly
- Installing non-return valve
- Lowering pump at safe depth
- Securing cable and pipe
- Connecting control box, inverter, or solar drive
- Testing rotation and electrical load
The pump should not be installed too close to the bottom of the bore because it may pull sand. It should also remain below pumping water level to avoid dry running.
Important protections include:
- Dry-run protection
- Overload protection
- Voltage protection
- Phase protection for three-phase pumps
- Earthing
- Proper cable jointing
- Waterproof connections
Step 15: Electrical or Solar Connection
The pump needs a reliable power source. The system may run on grid electricity, generator, or solar power.
For solar tube wells, system design includes:
- Solar panels
- Solar pump inverter/VFD
- Structure
- DC/AC wiring
- Protection devices
- Earthing
- Pump compatibility
- Water storage or direct irrigation plan
A solar system must be sized according to pump load. Weak panel capacity, poor inverter selection, or low-quality wiring can reduce water output.
For grid systems, voltage stability is very important. Low voltage can burn motors, reduce discharge, and damage control panels.
Step 16: Pipeline and Delivery System
Water flow does not depend only on the pump. Pipe size and layout also matter.
A wrong pipeline can reduce pressure and discharge even if the pump is powerful.
Pipeline design should consider:
- Pipe diameter
- Pipe length
- Delivery height
- Number of bends
- Friction loss
- Required pressure
- Storage tank height
- Irrigation system type
- Valve placement
For agriculture, the pipeline must match the irrigation method such as flood irrigation, drip irrigation, sprinkler, or center pivot. For homes and buildings, pressure control and storage tanks are important.
Step 17: Water Flow Testing
After pump and pipeline installation, the system must be tested.
Flow testing checks:
- Discharge quantity
- Water pressure
- Pump ampere/load
- Voltage stability
- Sand content
- Water clarity
- Water level drawdown
- Recovery after stopping
- Continuous running performance
Testing should not be done for only a few minutes. A bore may look good initially but fail after running for longer. Proper testing shows whether the bore and pump can perform consistently.
A flow test helps answer:
- How much water is available?
- Is the pump size correct?
- Is the bore producing sand?
- Is the water level stable?
- Can the system run for required hours?
- Is the discharge enough for the customer’s need?
Step 18: Water Quality Testing
For drinking, commercial, school, farmhouse, or food-related use, water quality testing is highly recommended.
Important water quality checks include:
- TDS
- pH
- Hardness
- Iron
- Turbidity
- Salinity
- Bacteria
- Odor and color
- Chemical contamination if suspected
For agriculture, water quality affects soil and crop health. High salinity or poor-quality water can damage land over time.
Comparison Table: Proper Bore Process vs Shortcut Bore Process
| Factor | Proper Bore Drilling Process | Shortcut / Poor Process |
|---|---|---|
| Site Selection | Based on survey, access, safety, and nearby water data | Random point selected quickly |
| Bore Design | Depth, diameter, casing, screen, and pump planned | Only depth is discussed |
| Drilling Log | Formation is observed and recorded | No proper record |
| Casing | Quality casing installed correctly | Cheap or weak casing used |
| Screen Placement | Installed in water-bearing zone | Guesswork placement |
| Gravel Pack | Clean and suitable filter pack used | Poor or no filter pack |
| Bore Development | Bore is cleaned until flow improves | Pump installed too early |
| Pump Selection | Based on water level, discharge, and head | Based only on horsepower |
| Water Flow | Stable and cleaner output | Sand, low flow, or pump damage |
| Long-Term Result | Better performance and longer life | Frequent complaints and repair cost |
Pros of a Proper Bore Drilling Process
- Better chance of reliable water flow
- Longer bore life
- Lower sand problems
- Better pump performance
- Reduced motor damage
- Cleaner water output
- Lower maintenance cost
- Better suitability for solar pumping
- More accurate pump selection
- Safer for drinking and domestic use
- Better planning for agriculture and industrial demand
Cons / Challenges of Bore Drilling
Even with a professional process, bore drilling has some challenges:
- Water availability is not guaranteed in every location
- Total depth may increase depending on formation
- Hard rock drilling can increase cost
- Poor groundwater quality may require filtration
- High sand areas need better screen and filter design
- Electricity or solar setup adds extra cost
- Maintenance is still required over time
- Neighboring bores and seasonal changes may affect water level
- Cheap shortcuts can cause expensive failure later
Common Mistakes to Avoid
Avoid these mistakes if you want a successful bore:
- Drilling without investigation
- Choosing the cheapest contractor only
- Using low-quality casing
- Ignoring bore development
- Installing oversized pump
- Installing pump too deep or too low
- Ignoring sand during testing
- Using undersized delivery pipe
- Running pump without protection
- Not checking water quality
- Not keeping bore record
Final Checklist Before Handover
Before the project is completed, check:
- Bore depth confirmed
- Casing size confirmed
- Screen position noted
- Bore developed properly
- Pump installed at safe depth
- Electrical protection installed
- Water flow tested
- Sand condition checked
- Pipeline connected properly
- Customer trained on basic operation
- Maintenance instructions given
Final Verdict: A Successful Bore Is a Complete System
From bore drilling to water flow, every step matters.A bore is not just a hole. It is a complete water system that includes geology, engineering, pump technology, electrical safety, and proper testing.
The best results come when drilling, casing, screen, filter pack, pump selection, and water testing are handled professionally. A properly completed bore can serve for years with stable water flow, lower maintenance, and better return on investment.
Final eye-catching line:
Drilling finds the water, but proper completion makes the water flow.